- 1. We suppose what you already had the plug-in installed and registered.
If not yet then please read
this short instruction firstly.
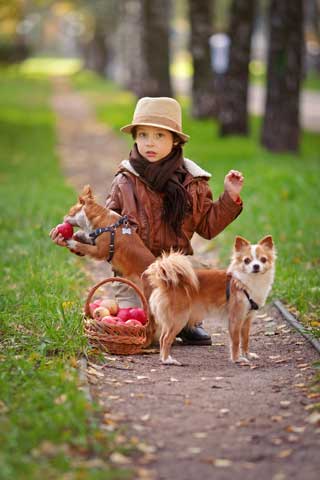
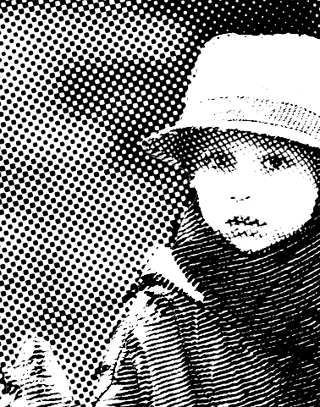
- 2. Open in the Photoshop any picture what you want to turn into an engraving art. As you gain experience using
EngraverAI, you will
get an idea of how to pre-process the original image before applying
EngraverAI. You may need to edit some pictures or increase the brightness/contrast.
The specific preprocessing steps depend on your experience and designer skills.
- 3. Go to Photoshop's menu
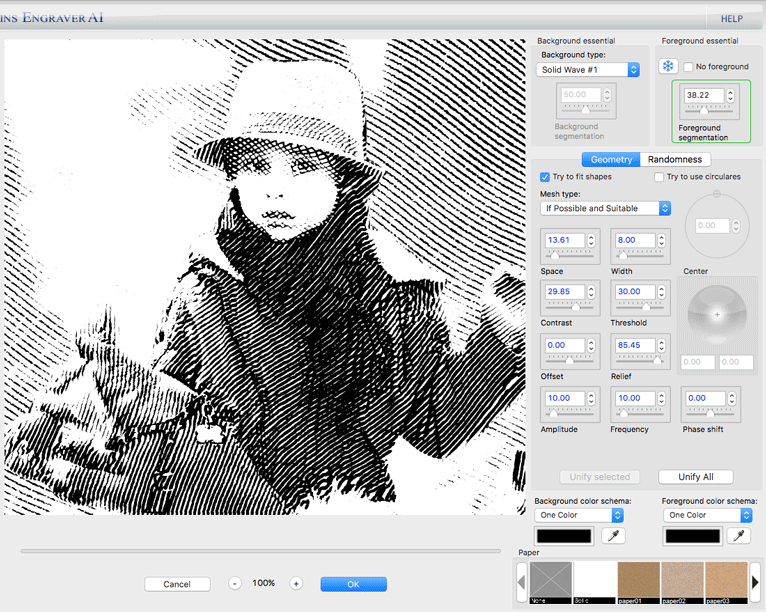
Filter->AlphaPlugins->EngraverAI and launch the plug-in. You will see the follow plug-in's dialog window.
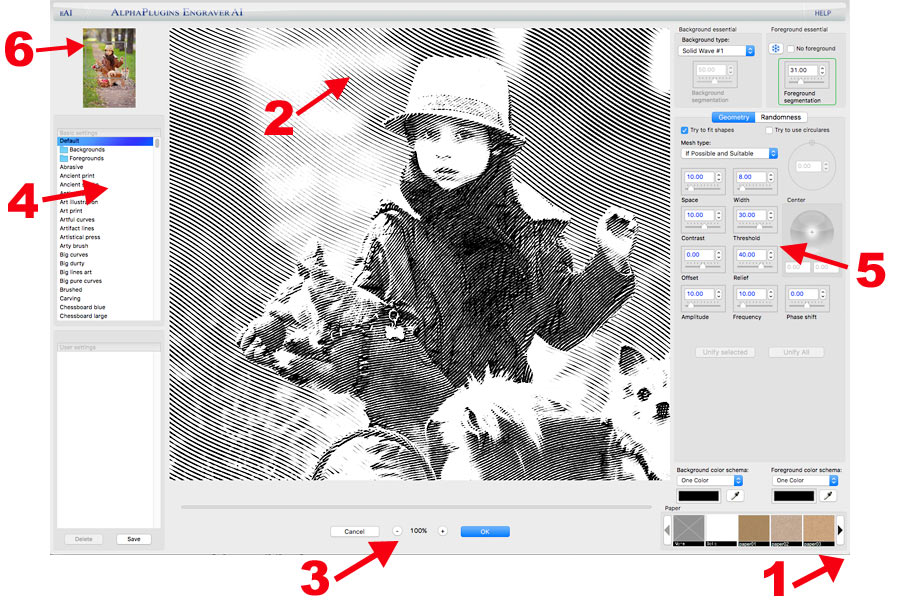
The plug-in's user interface window
- 4. On this illustration red digit marks designate main functional areas of plug-in interface:
1) You can resize UI window as you want by pulling a windows border with mouse.
2) Preview area. You can scroll through the preview image here, and the effect will be applied only to the visible part of the original image.
As a result the preview will be rendered much faster than the entire image. You can also select a specific image segment or background in the
preview area and adjust some filter parameters graphically, but this is the subject of further narration.
3) You can zoom in or out the preview. Either as you can press hotkeys, such as Ctrl (or Cmd for mac) +

,
Ctrl+

,
Ctrl+”0” or
Ctrl+”1”;
4) Factory presets area. Here you can find many useful parameters presets grouped into thematic folders. You can start a working process by applying an
appropriate preset as a first approach and then just tune up few specific parameters if you want. And of course, you can save your self presets.
5) Parameters area. In follow we will describe this area more detailed.
6) Navigate area. You can quick move the preview rectangle on a needed region of source window.
- 5. When the plug-in window has been launched then by default the plug-in will try to find main object(s) in the composition and automatically
separate it from the background. In follow, main object(s) and background will be processed with different parameters. But if the result of automatically
object detection and background separation does not satisfy you then you always can make this by hand. Simple use the standard Photoshop's tool(s) to
select a desired object and apply the
EngraverAI filter. The selected mask will be considered as the foreground object(s) and the unselected
area as the background.
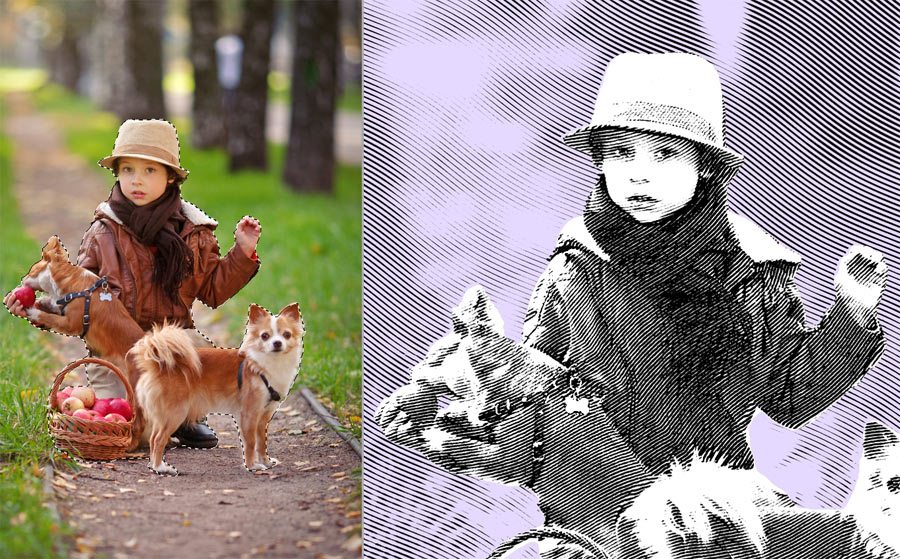
Background and foreground objects can be split or automatically or manually with using a selection mask.
-6. If you dont wont to split foreground and background objects then you may not do it. You can process whole picture as a background or as a
foreground only. Just check on
No foreground or pick in the list
Background type the
Only Foreground option.
Whole picture can be processed as a solidly background or as a solid foreground.
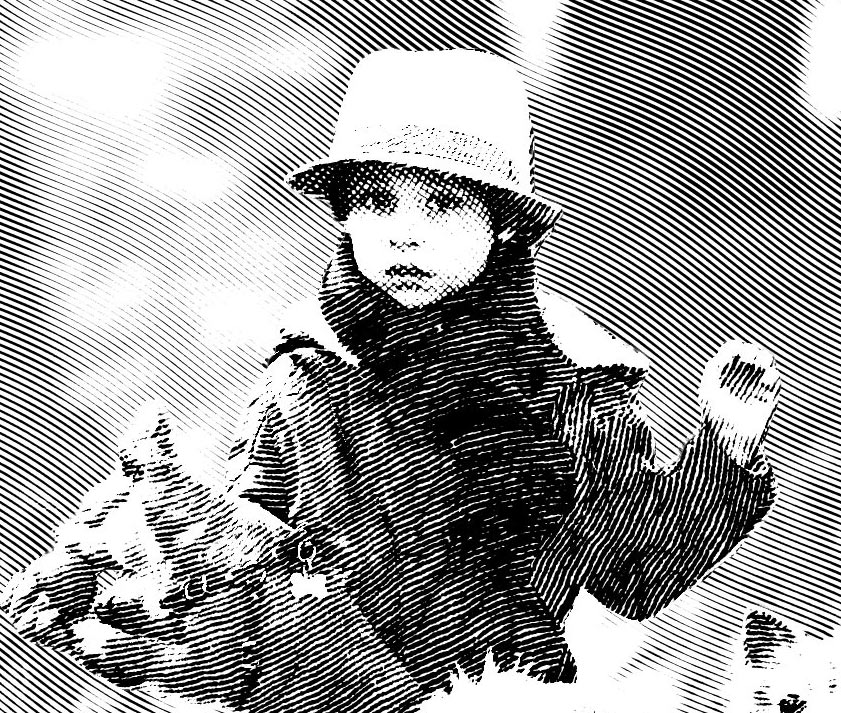
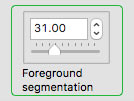
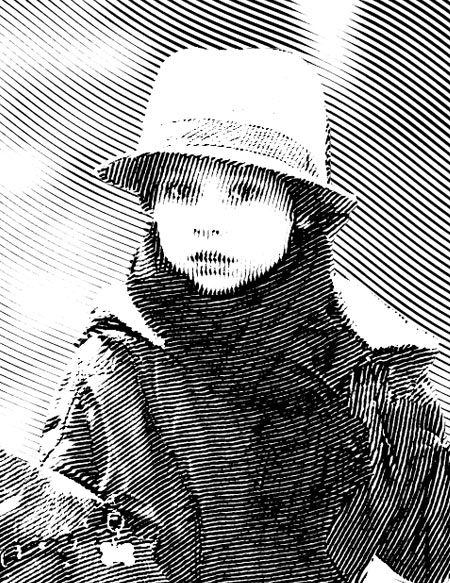
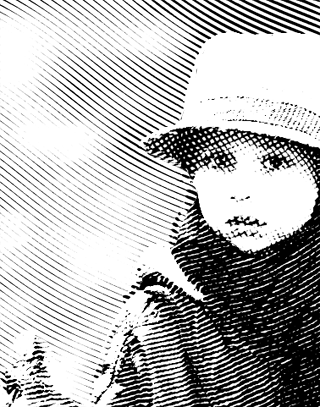
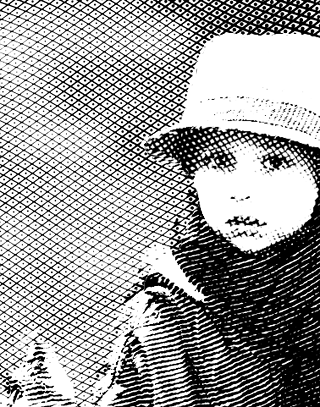
-7. So, you have the original picture split (automatically or by hands) into the background and foreground parts. Now the foreground object will
automatically be fragmented into semantic segments. You can control segmentation process with help of the
Foreground segmentation
parameter. The larger this parameter gives the greater the number of fragments. If the value is 0 then the foreground object(s) is supposed as solid.
You should understand that this parameter is very important. By adjusting this parameter you determine the main appearance of your engraving
scene. You can simply gradually change the value of this control and, therefore, get different looking results until you find a suitable variant.
Before you customize other engraving options, you must determine how your scene will be segmented into fragments. And your following effect adjusting
process will depend on your choose made in this step. This parameter is so important what I even outlined this with a green rectangle.
Entire process of the follow setup parameters will depend on your choose of the
Foreground segmentation value.
-8. When you have determined how your foreground object is fragmented, you can proceed to setting up other engraving options.
In border of this tutorial we have no an intention to describe parameters responded for engraving process. We describe only a general plug-in workflow.
But you can choose and apply any suitable background and foreground preset from the factory presets list. Here are hundreds factory presets especially
only background and foreground engraving parameters and these will not affect on general plug-in parameters.
To setup engraving parameters for background it is need to choose the picture's background - just click on the background area in preview
window. The background area will be colored with a purple tinge and engraving controls will be bordered with blue rectangles.
For background you can choose different types of engraving patterns.
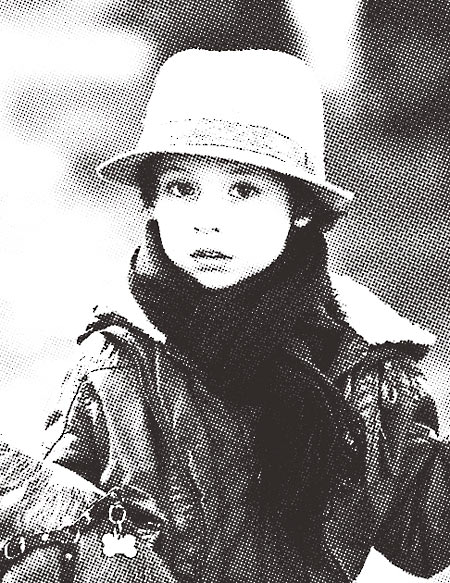
-9. So, you have generally adjusted engraving parameters for background and foreground parts. Now you can correct engraving parameters for
individual foreground segments. Just click in the preview window on a desired fragment and it will become selected. It will be marked with a pink
tinge and all engraving controls will be outlined with red borders if you change an engraving parameter for the selected fragment.
All changes for individual segments can be deleted if you press buttons
Unify Selected or
Unify All or if
you just change
Foreground segmentation parameter.
You can setup engraving parameters for any individual foreground fragment
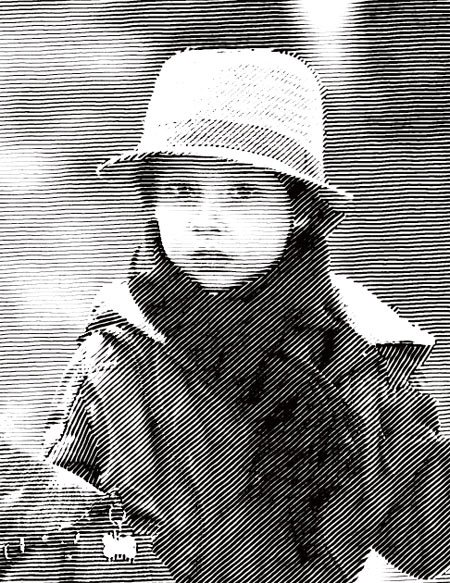
-10. And as a final touch you can customize ink colors and paper texture for your composition using the controls at the bottom of the control area.
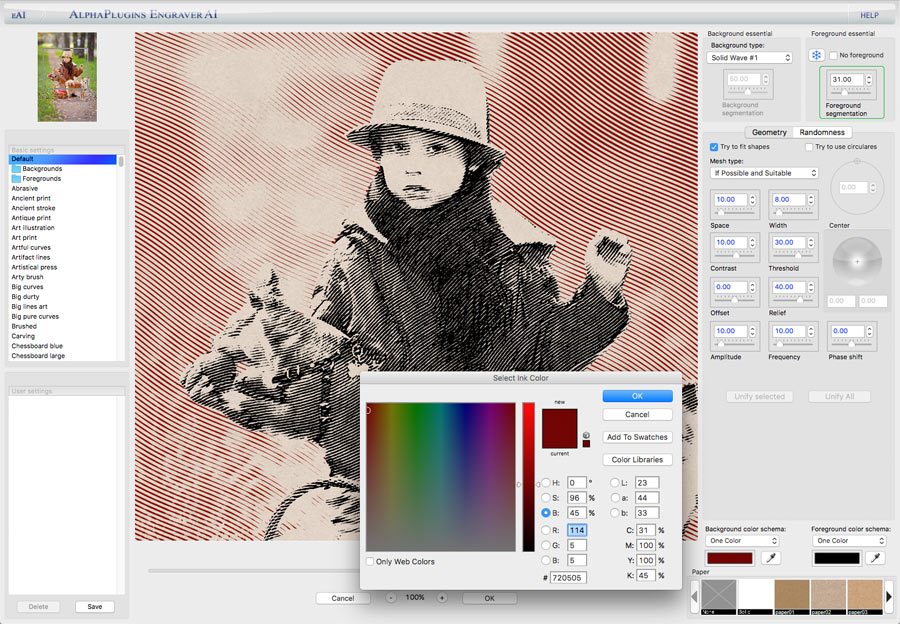
The final result looks much more realistic if you play with ink colors and underlying paper.
Conclusion
In this simple tutorial, we just covered the basic approaches to working with the amazing EngraverAI tool. I hope this will allow you to
understand the basic principle of how to use this product. And this tutorial introduces you to the infinite and incredible power of the world of
fantastic tool
EngraverAI. And it will be your door to the enchanting universe of engraving art, which is now becoming so simple and accessible as
never before.

 iOS Apps