| Fire Combustion Effect Tutorial |
|
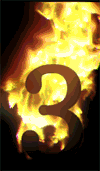
How to create fire combustion effect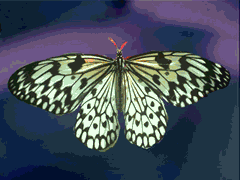 Pic.1 Sample of fire combustion
 Because new FireFor plug-in was released then this Fire3's tutorial is DATED!
This lesson tells you how to create animated GIF files with combustion. You can use this effect for burning out pages, objects, or text. This tutorial is intended for Adobe Photoshop and other graphics editors which support Photoshop's plug-in modules (such as PaintShopPro, Painter, Xara and so on). To create the combustion effect you should use the Fire3 plug-in filter for Adobe Photoshop. In Pic.1 you can see one example of a picture with a burning effect. These instructions will show you how to create this effect while giving you a bit of familiarity with the Fire3 module and its uses. After this tutorial you will be able to create many interesting pictures. We hope that this description teaches you some new tricks and approaches in Photoshop and helps increase your professional skills as well as helping to make your business a success. 1. Mask for combustion.Before creating the combustion effect you must prepare the mask that you will burn. This can be any picture on a transparent background. You can see several examples of possible masks below(Pic.2). For simplicity, we will use a very simple mask in this tutorial. The mask can be more complex if you wish; it depends on what you are trying to do. 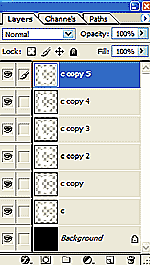
Pic.3 Mask copies |
| 2. 2. Preparing the frames for animation.Once you have created a mask, you should prepare frames for future animation. If you do not wish to make an animation but plan to use a static picture then you may skip these steps. To create the animated GIF we will use the Adobe ImageReady application. We will prepare a sequence of frames. In Photoshop we will make several layers which will be converted into frames later. In Photoshop you can use the "Duplicate layer" item in the Layers window or just select "Mask layer" and click the "Create a new layer" button. In Photoshop's compatible editors you should use their means of creating several copies of a mask layer. (Pic.3) |
Pic.4 Fire3 dialog window |
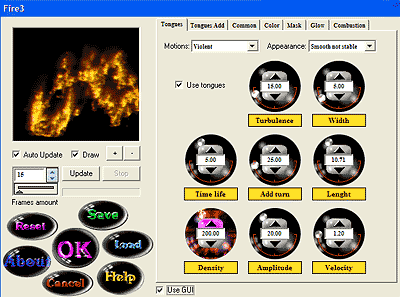
3. Applying Fire3 filter.In order to create the combustion effect we need to have the special Fire3 filter. You can download this filter from this site. After installation you can see the new item "Panopticum/Fire3" in the Filter menu. Select it. You will see a dialog window with several settings. (Pic.4) 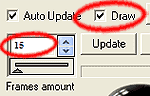
Pic.5 Preliminary steps |
In the left part of the dialog box there is a preview window. In this window you can see preliminary rough fire results. In the right part of dialog box there are settings of a fire process in the tabbed dialog. You can select a tab and choose form the available options. First, you should do two things:
Switch on the Draw checkbox. Now you can see the process of your fire creation. This allows you to better understand how it all works.
Decrease the Frame amount. For a combustion effect we don't need a big flame and we can reduce the iterations number to increase the speed of drawing. Set Frame amount i.e 20. (Pic.5) Tip. You can change the skin for the Fire3 interface and instead of animated controllers you can use others which are more simple and faster. To do this, just switch off the checkbox Use GUI in the dialog window. 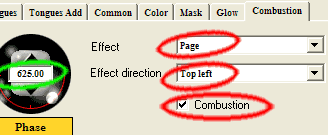
Pic.6 Combustion parameters |
4. Create Combustion effectGo to the Combustion tab.
Switch on the checkbox Combustion.
Select Page in Effect listbox.
Sel the Effect direction i.e. Top left.
Set the Phase parameter as necessary for seeing the fire effect in the preview window.
Set the Snuff parameter to make your composition a bit more realistic. (Pic.6) 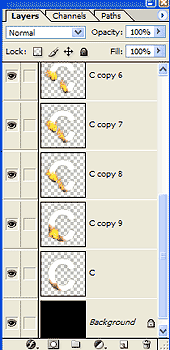
Pic.8 Layers window |
| 5. Adjust burning parameters.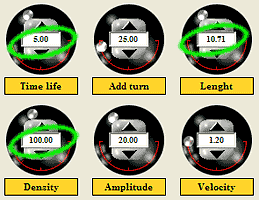
Pic.7 Tongues parameters |
Increase the density of the flame tongues. Set the Density value to 100.
Set the Time of life for tongues to 5.
Set the Length of tongues to 10.
You can adjust other fire settings as you wish and produce many beautiful fire compositions. (Pic.7) 6. 5. Create an animated combustion sequence.Now for creating an animated combustion sequence. You should gradually apply the Fire3 filter to each layer. For each frame you should increase the value of the Phase parameter in the Combustion tab. For example, for the first layer it can be set to 0.0 … the last frame can be set to 1000. Tip. You can also animate the values of other settings, (for example, Snuff) to make your fire more attractive. When you have done all these steps, then your compositions will look similar to Pic.8. |
7. Create an animated GIF from a compositionNow you are ready to create an animated GIF file from your fire composition.
Press button Edit in ImageReady or Shift+Ctrl+M. You have now switched to ImageReady. In the Optimize window set the Format to GIF.
In the Transparency window switch off the Transparency checkbox.
Open Optimized view for your composition.
In the Animation window in local menu choose the item Make Frames From Layers.
Your animation window will look something like Pic.9. 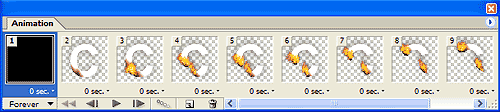 Pic.9 Animated window in ImageReady. Now simply delete some extra frames and set the delay time for each. Finally, save your fire GIF. To do this, select File and then Save Optimized As… or press Ctrl+Shift+Alt+S. Your end results should look like Pic.10. 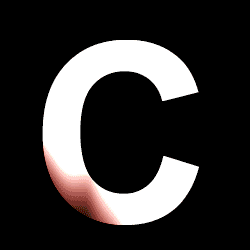 Pic.10 Result of this lesson. Conclusions.You now know how to create the animated fire composition with combustion effects. Remember, these were only the basics. This tutorial helps you to understand the main idea of how to use Fire3 plug-in. You can continue to explore this filter on your own and create many interesting fire pictures. 
For your convenience we have prepared a Photoshop action that reproduces the steps of this lesson. You can download this action from this website. Install this action on your Photoshop by clicking on Load Actions from the Action window of Photoshop. After the installation you can simply launch the action by pressing the Play button. Go to Fire3 product's page
Download Phootoshop's Actions for this tutorial
See also tutorial "How to create a GIF file with animated fire."
| 
 iOS Apps