 | |  |
AlphaPlugins EngraverAI plug-in for Adobe Photoshop | |  | |
IntroductionThe AlphaPlugins EngraverAI is a high-intellectual plug-in for Adobe Photoshop CCXX what allows to convert pictures into realistic hand-made looking engraving art.
The main feature of the plug-in is an artificial intelligence that usage makes the creative process easier and more time efficient while maintaining overall quality.
The EngraverAI is the next level for the AlphaPlugins series of tools for engraving and etching. This new, state-of-the-art product is user-friendly,
and was made with customer satisfaction in mind |
What’s New
- Artificial intelligence
- -for split background and foreground objects in composition.
- Automatically image fragmentation
- -and apply individual engraving parameters for each segment.
- Smart inner math
- -tries to fit each fragment with maximal suitable pattern.
- New types of engraving
- -geometry, patterns and meshes.
- Power synchronously engine
- -with maximal speed and supreme quality.
- Thoughtful user interface
- -with smart features for efficient operation.
- Lot of factory presets
- -for quick and productive work.
| 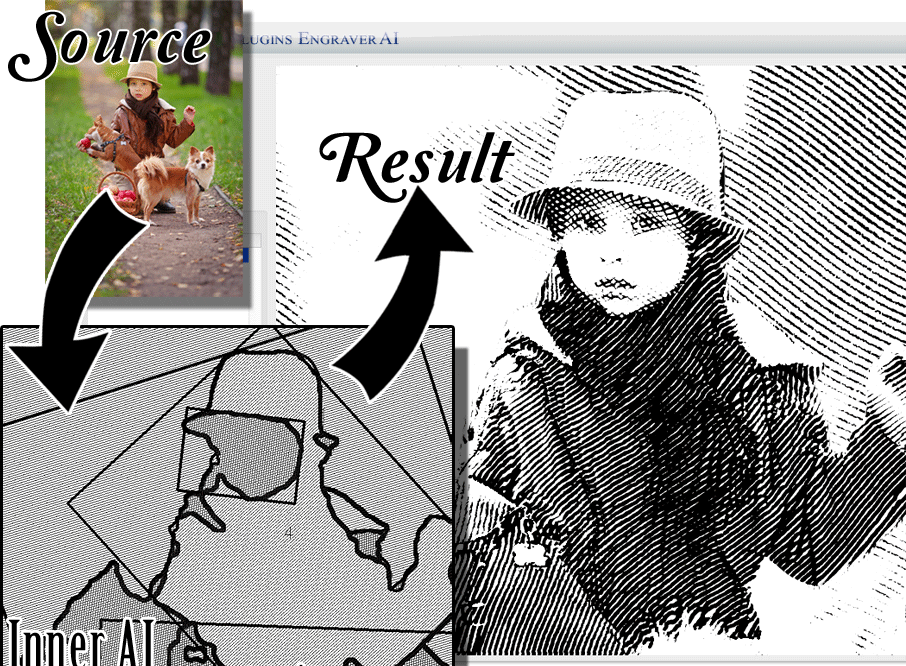 | |
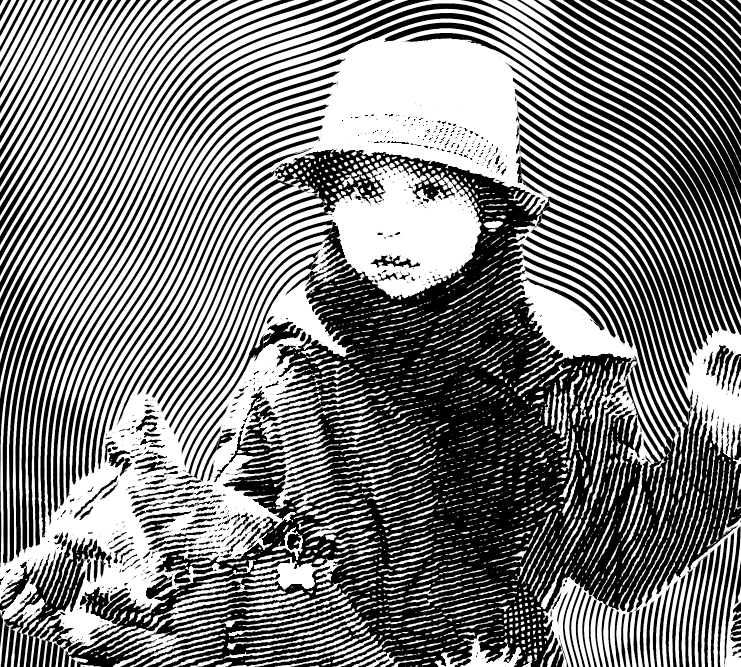
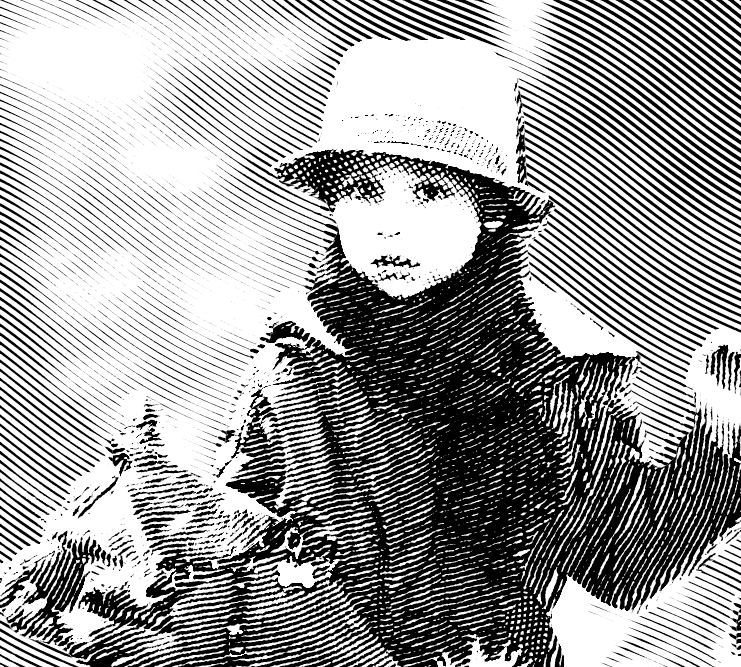
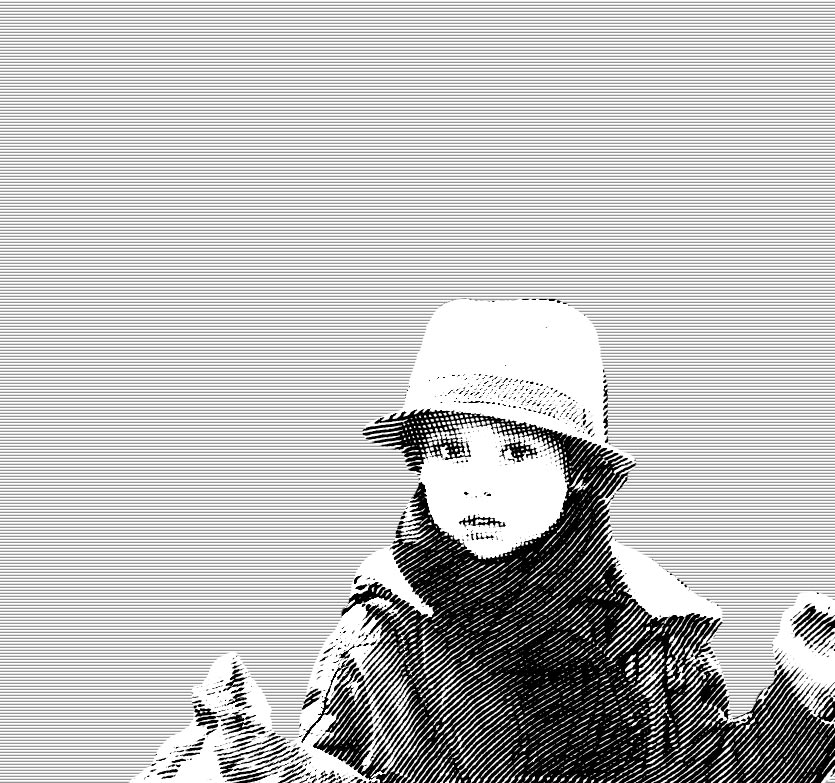
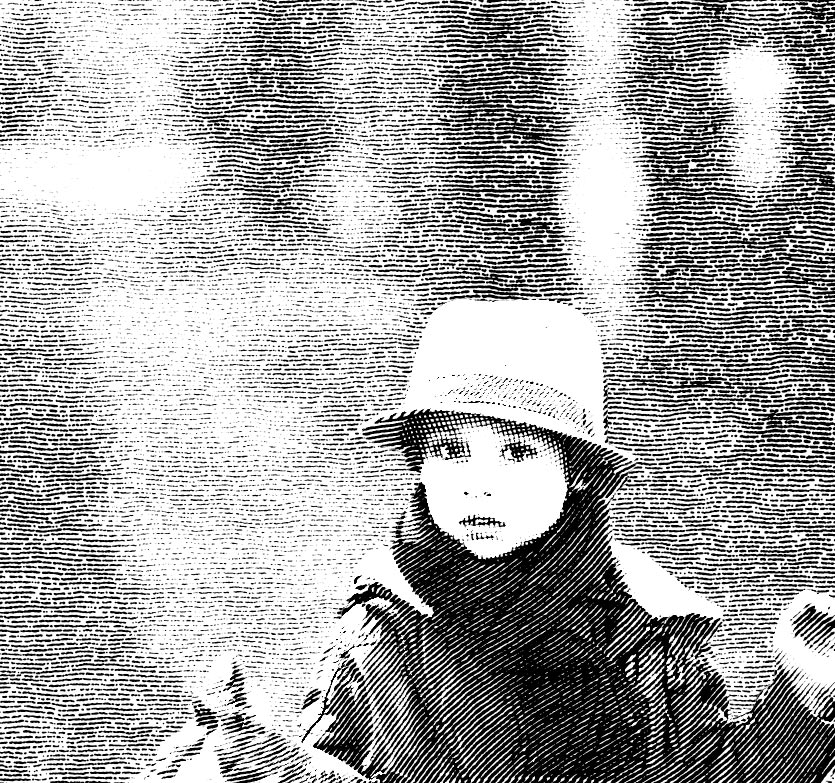
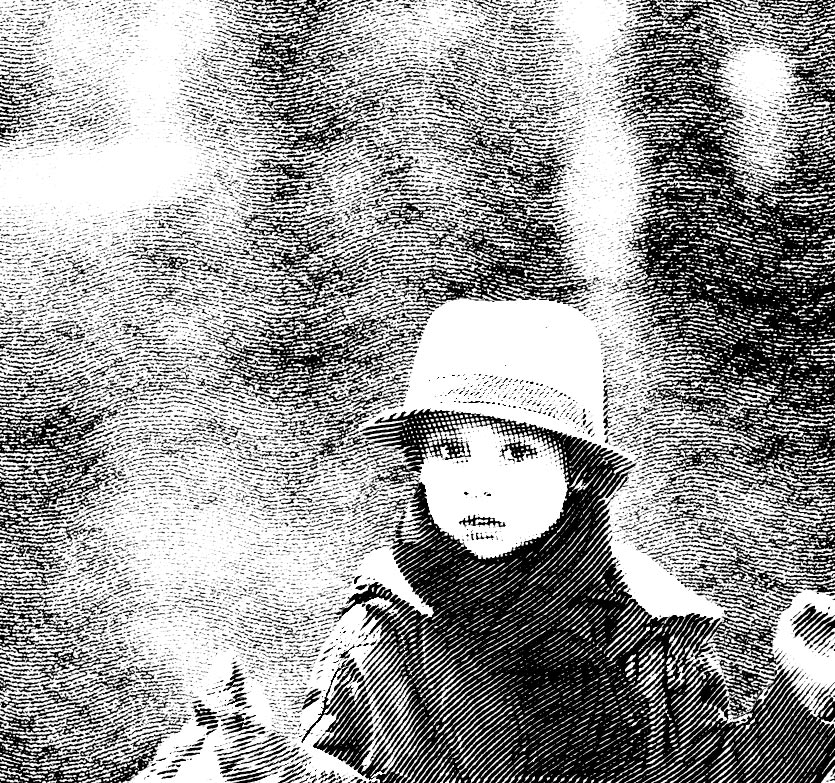
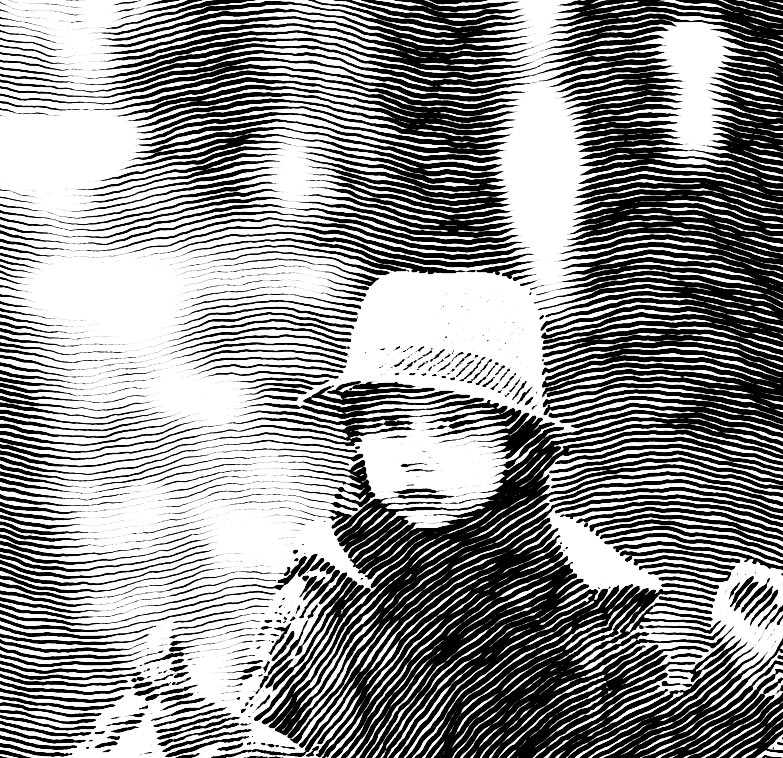
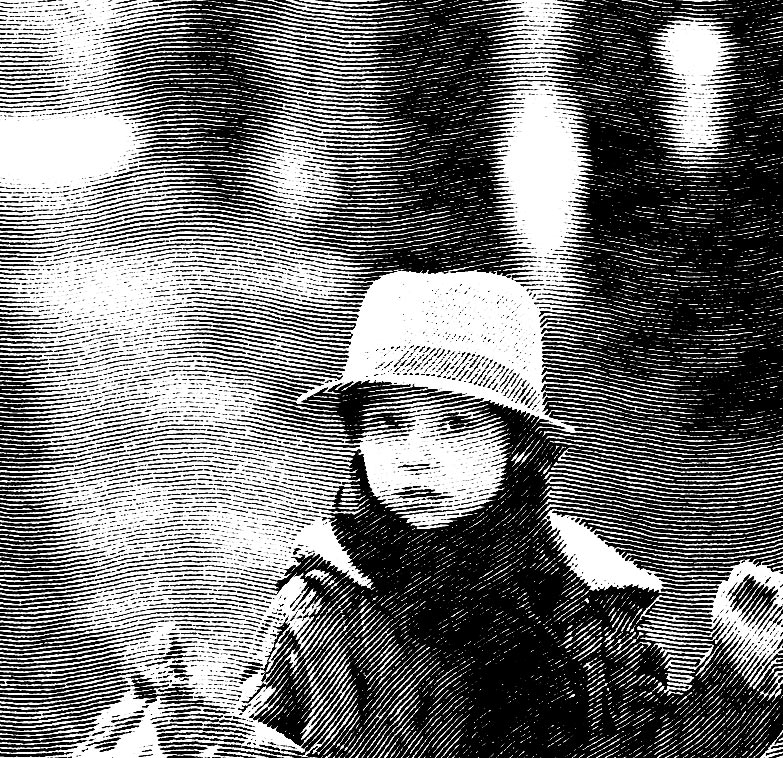
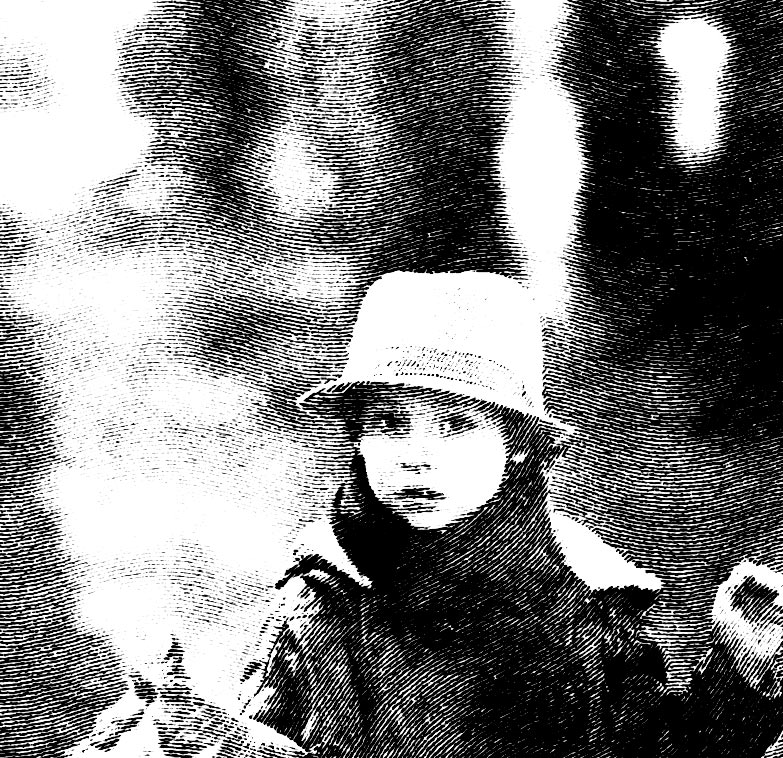
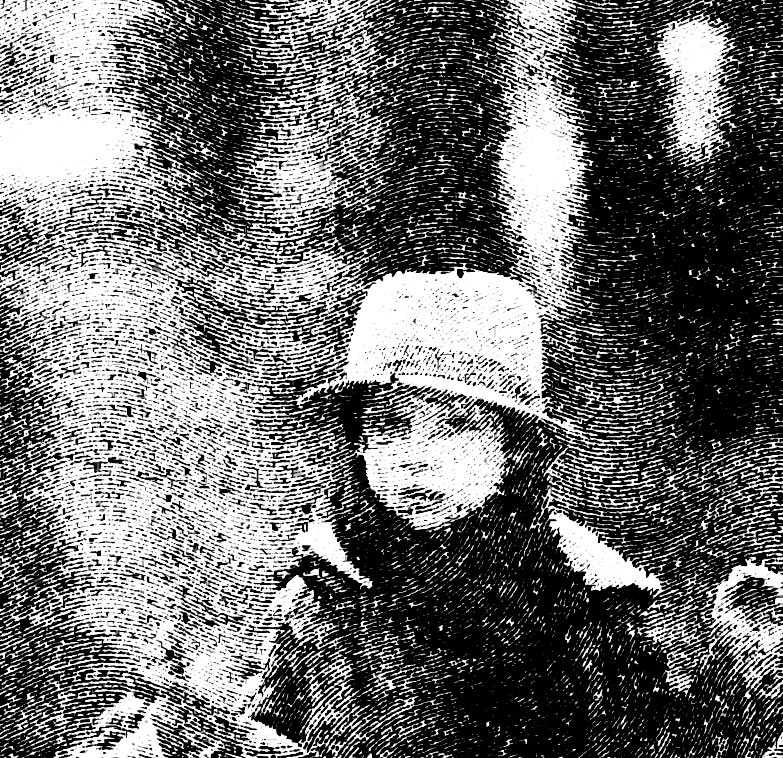
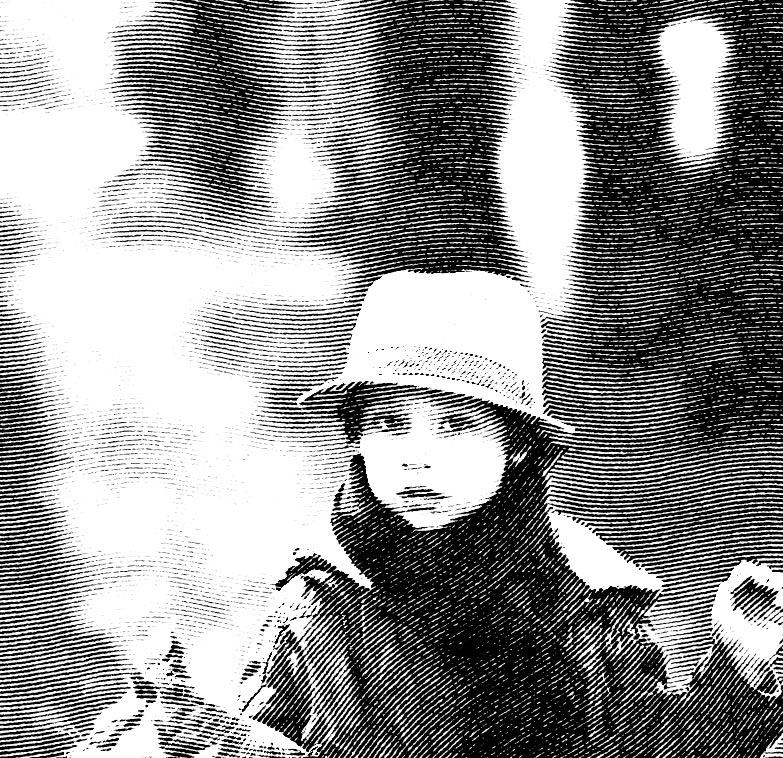
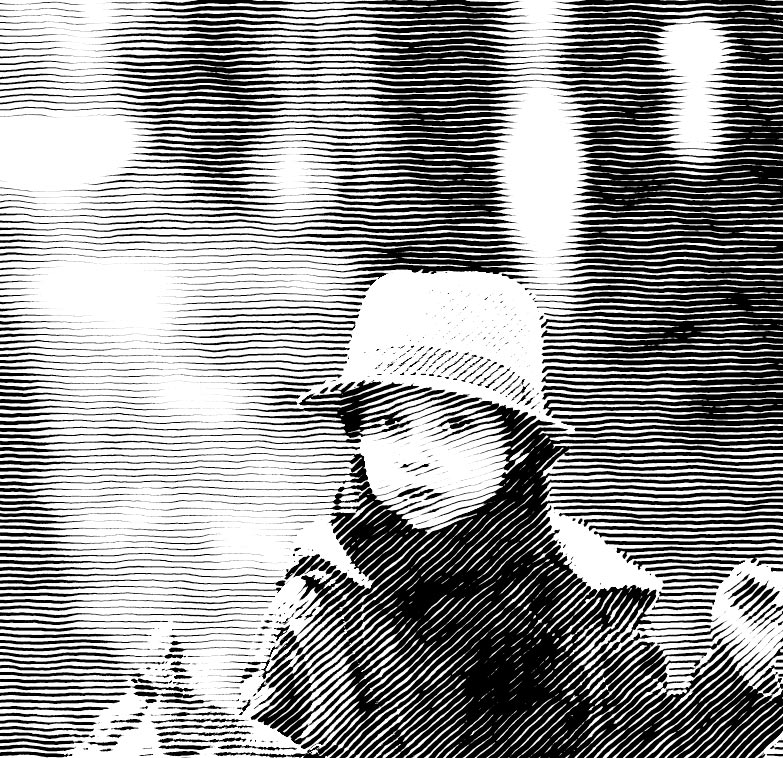
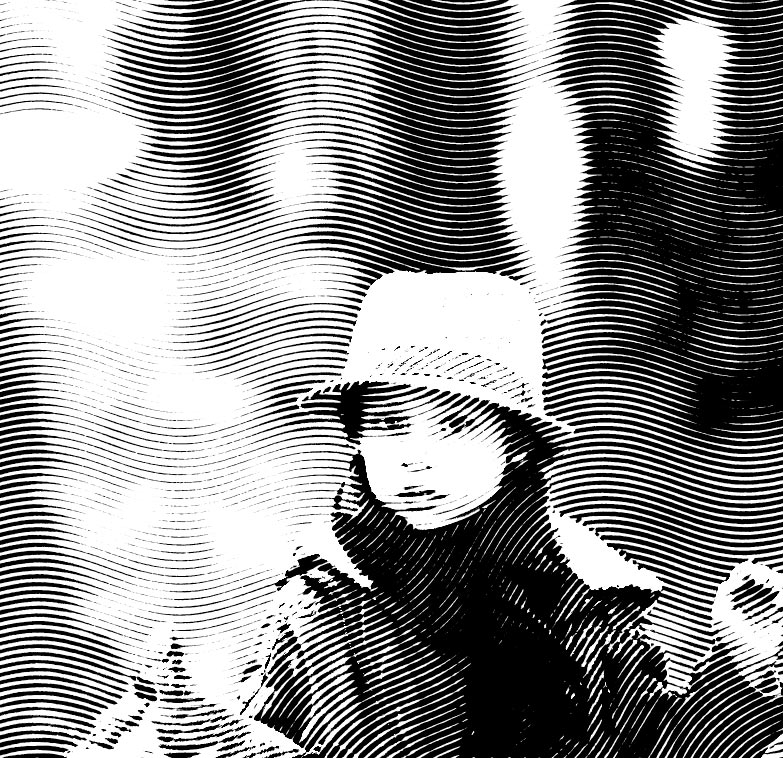
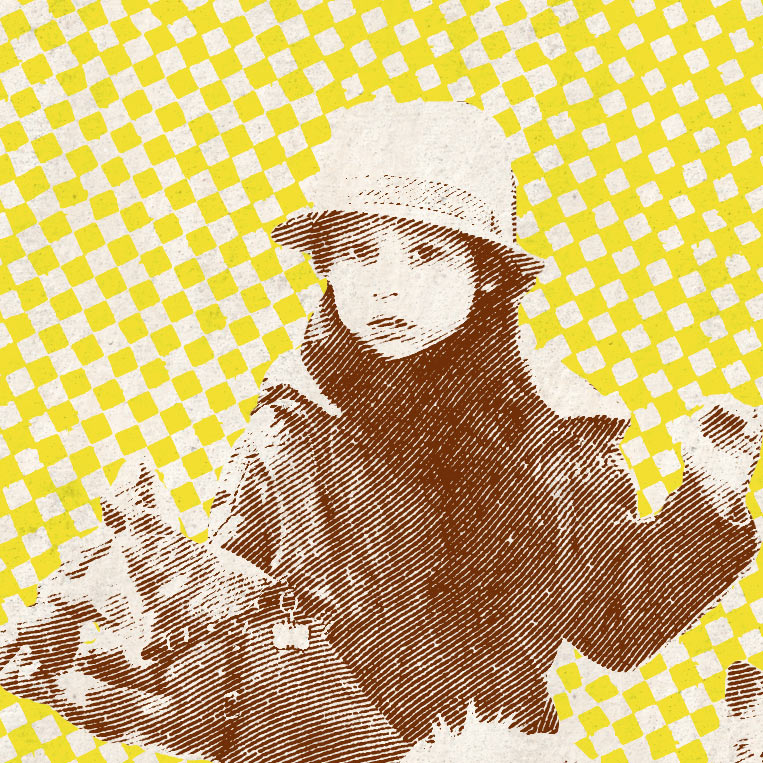
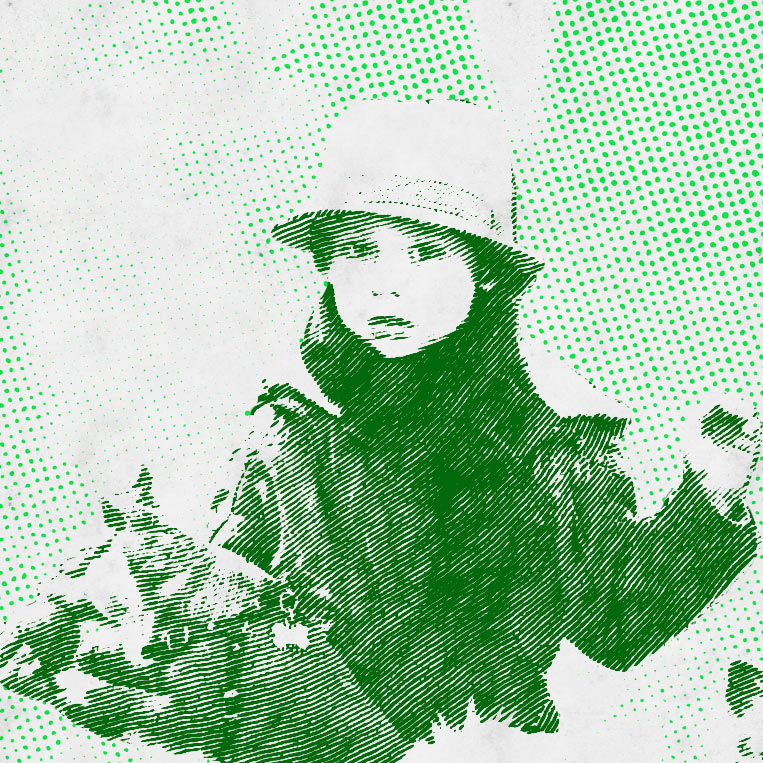
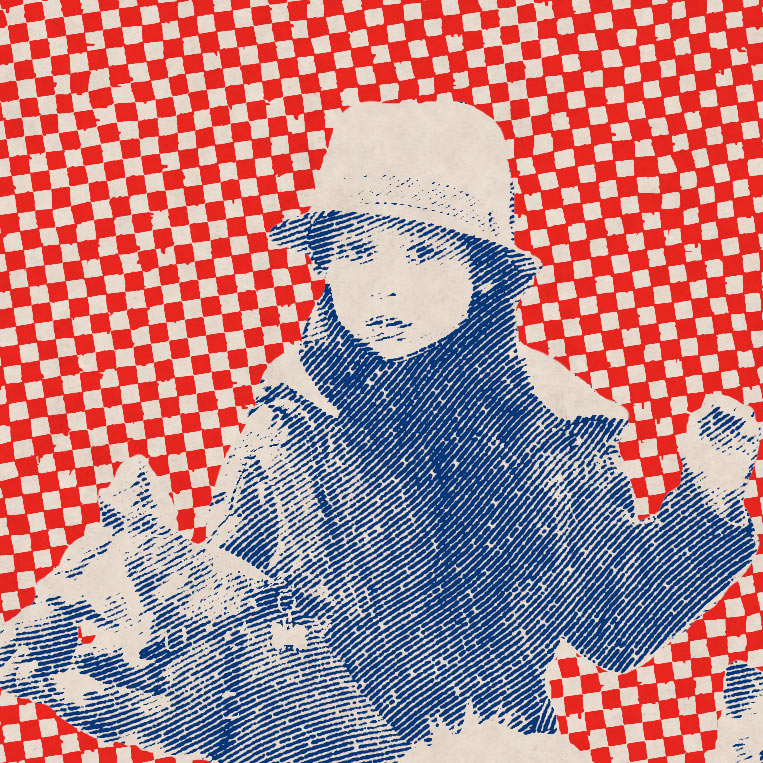
 | A sample how the artificial intelligence automatically represents an image segmented and applies most suitable engraving parameters for each fragment |
|  | Q: Is the EngraverAI a substitution to EngraverIII plug-in?
A: Absolutely no. Although both products work with engraving art but the main concept of they is different. You can use both products
for different cases. More that, if you already have an EngraverIII license then you can get the EngraverAI by a
special price if you use this form. |
| Engraver |  |
| |  | |  |
 | |  |
| Quick Start | |
| |
So, it is supposed what you already have the EngraverAI installed and registered on your computer. If not then read the previous chapter
Launch Photoshop, and open a picture that is 8bits per channel in either RGB or CMYK mode. Pull down the Filter menu and choose the Alpha Plugins > EngraverAI menu item.
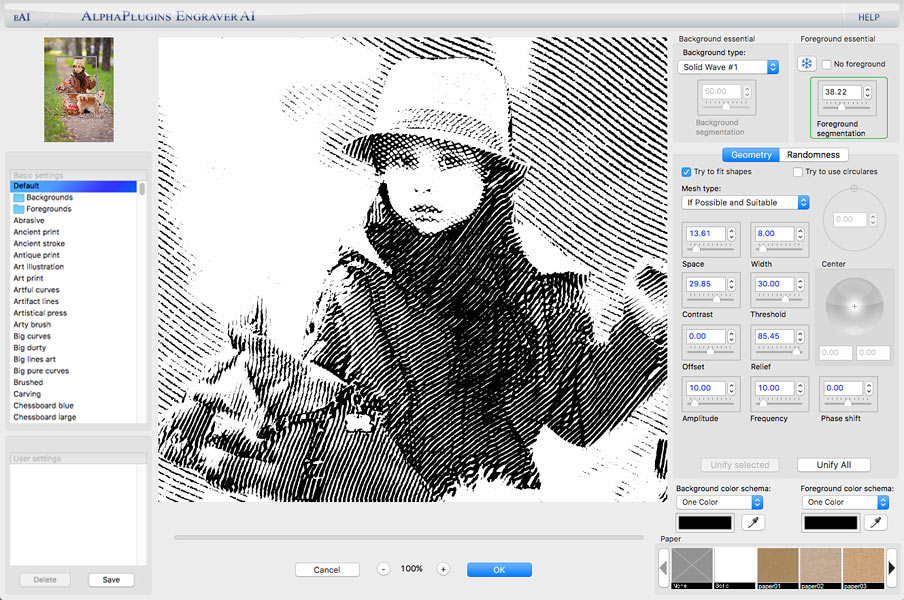 Screenshot of EngraverAI user interface window (clickable)
EngraverAI interface WindowYou can resize the EngraverAI window as needed. Resizing the window also resizes the preview area. You can increase or decrease preview scale by pressing: or or  buttons below the preview pane buttons below the preview pane- Ctrl (Cmd on Mac) “+” and “-” keys
- Ctrl (Cmd) + “0” or “1” keys
To change the area shown in the preview pane, look at the small picture in upper left, and move the small square to a different area on the image. Or just drag the preview area with holding left mouse button
In the preview area, you can select a fragment or background. Just click on the needed fragment and it will be marked with a color. If
there is a selected fragment, then all parameter changes are applied only on the selected fragment.
Also in the preview area, you can adjust the center of some effects. If you choose the engraver background pattern as some kind of
ellipse or helix, then in the preview area you will see crosshairs denoting the center of the radial effect. Just move the crosshairs with you mouse
to change the center of the effect. Or as an alternative, you can set up the center of an effect by a sphere center control.
Factory Preset AreaAt left side of window you can see a list with factory presets. You can apply a preset from this list to quickly explore plug-in features. In bottom list you can save your own favorite parameter settings.
Engraving ControlsAt the right side of the plug-in window, you can see the controls for the effect's parameters. On the top of the control panel there are two
small groups of parameters, Background essential and Foreground essential. As the names imply, these parameters are important for
general effect appearance. You should start adjusting the effect with parameters from these groups. There, you can define that your effect is
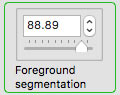
separately foreground and background and what kind. If you’re supposed to use a split foreground, then the control Foreground segmentation
defines how the scene will be divided on separated fragments.
This control is so important that it is marked with a green border. Before you adjust other engraver parameters, you must choose how your scene will be
fragmented in zones. Only when you find a suitable fragments combination will you be able to pass to adjust other effect parameters.
Please, remember the rules of how to use the plug-in in the most efficient way:
- First of all, decide if a scene will be divided on background or foreground, and how it will be executed – automatically, or with Photoshop's selection tool.
- If you choose foreground then with the help of the Foreground segmentation control, find the best fragments combination.
- Now you can adjust other the engraving parameters’ response for linear geometry and random noises.
- When you set up general engraver parameters, you can retouch parameters for individual segments. Just select a needed segment in the preview
window (it will become marked with color) and adjust engraver parameters for the selected segment only. If a segment has customized parameters,
then the engraver controls will get a red border around them when you select this segment. (Or a blue border if you select and adjust the background.)
- As a final touch, define the engraving ink colors and apply underlaid paper if you wish.
When you launch the plug-in dialog, it tries to split background and main objects automatically. If the automatic result isn’t satisfactory, you
can split the background and foreground yourself by using the Photoshop selection tool.
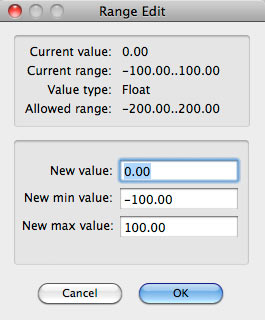
Parameter Values and Default Ranges Note that some controls have blue digits, and some black (on Windows, all digits are black, but have blue or black borders on the sliders.
Black digits/borders mean that the default ranges of the parameters are fixed. Blue digits/borders mean that you can alter the default ranges. Right click (or Ctrl + click on Mac) over the slider area and a special dialog box appears to allow you to alter the default parameter ranges. 
|  |
When You’re FinishedWhen you finish setting parameters. Click the OK button, or click Cancel to exit without applying filters. Because EngraverAI's engine works synchronously then you can close plug-in's window in any time dont wait until it's finished a rendering process
|
| |  | |  |
| | |
| Filter Parameters | |
| |
The controls response for engraver parameters are placed at the right side of the plug-in window. In top left corner
there are essential parameters for effect. I would like to accentuate what it needs to begin a parameters setup with adjusting essential background
and foreground parameters.
Background essential group- Background type – this list contains a lot of possible engraver effects for your background.
If you used EngraverIII, then you will see many known types of engraver geometry. With the exception of the already-known pattern types,
you can find many new beautiful types of engravings, patterns, and meshes. In the beginning of this list there are several choices of what defines the
general type of background usage:
- Remove Background - fully delete background from the scene.
- Only Foreground - the whole picture will appear as a foreground object. Previously it would also delete the background, but
in this case, the background area will not be deleted but be processed - same as the foreground.
- Auto Fragmented - the background will be automatically fragmented on semantic segments.
- And further on this list, there are several tenses of different engraver patterns and meshes.
- Background segmentation – if you choose Auto Fragmented in the above list, then this parameter will define how the
background area will be fragmented in thematic segments.
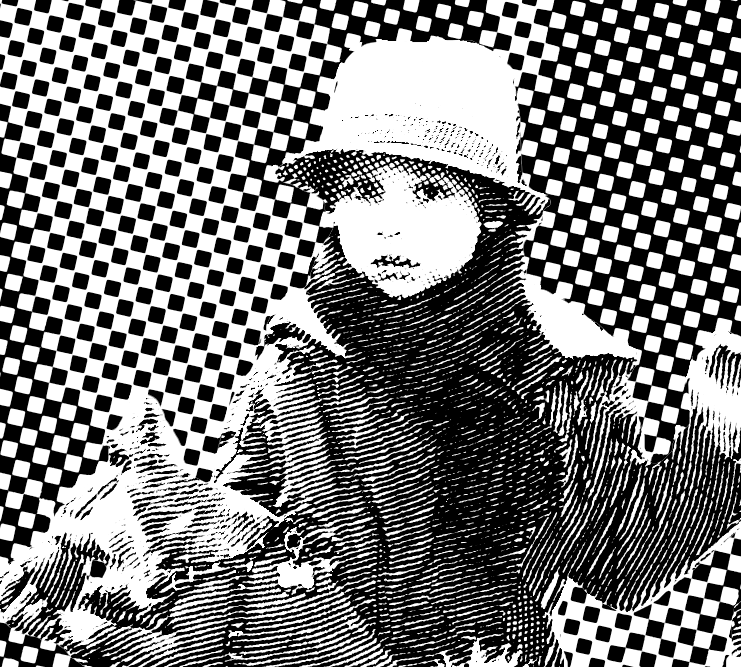
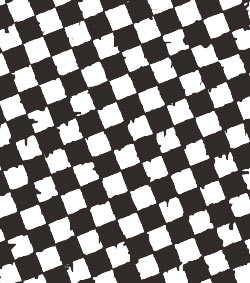
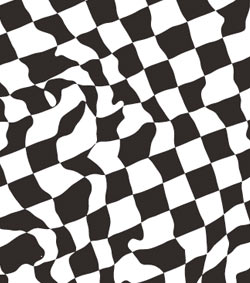
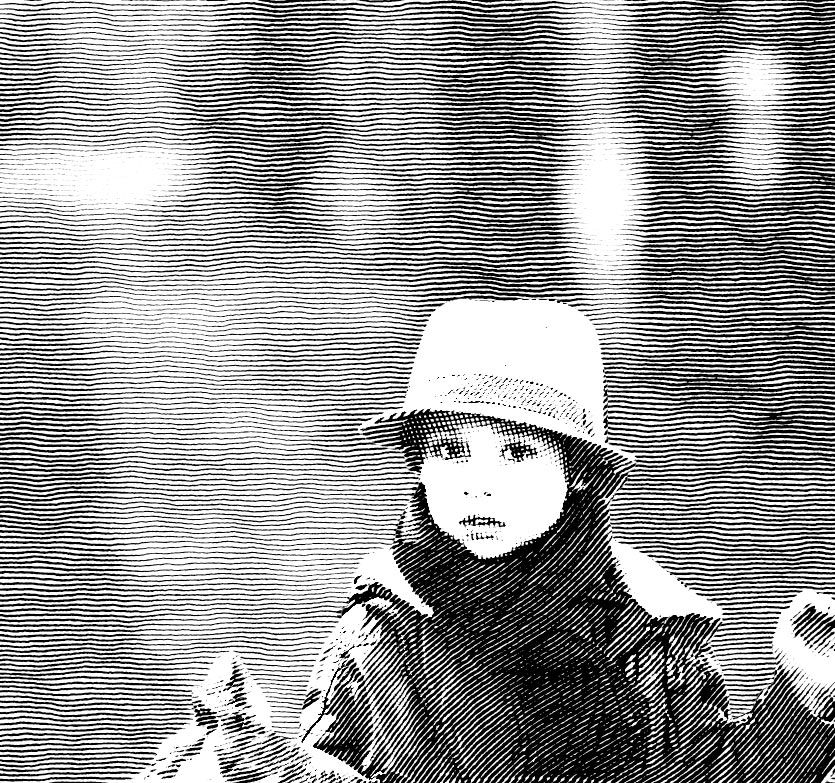
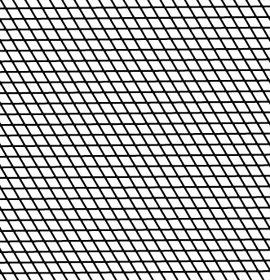
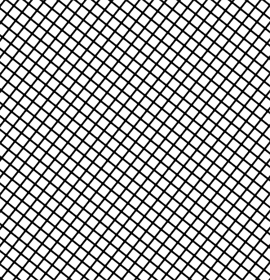
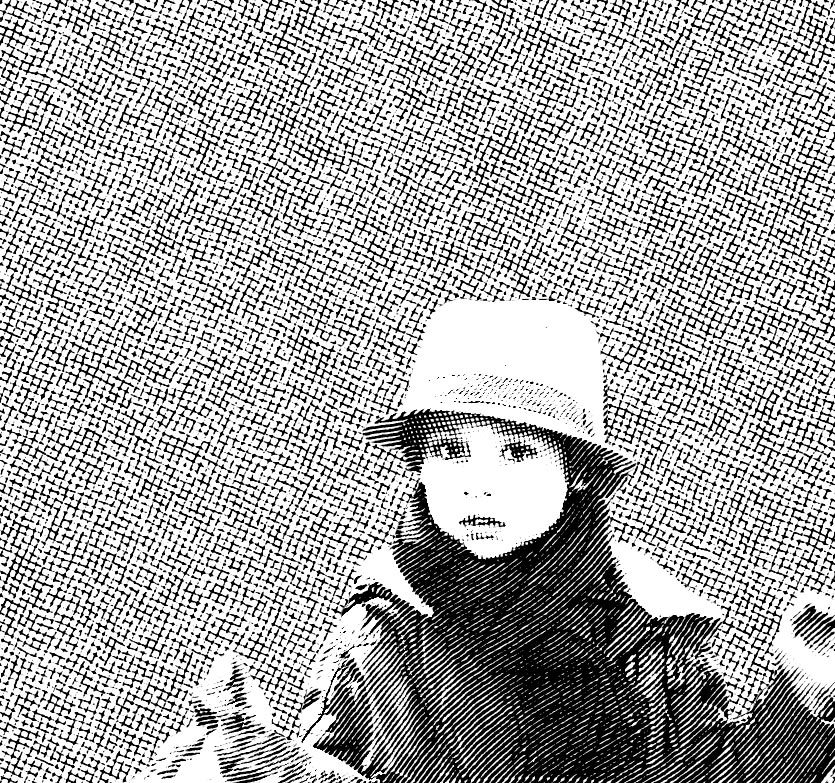
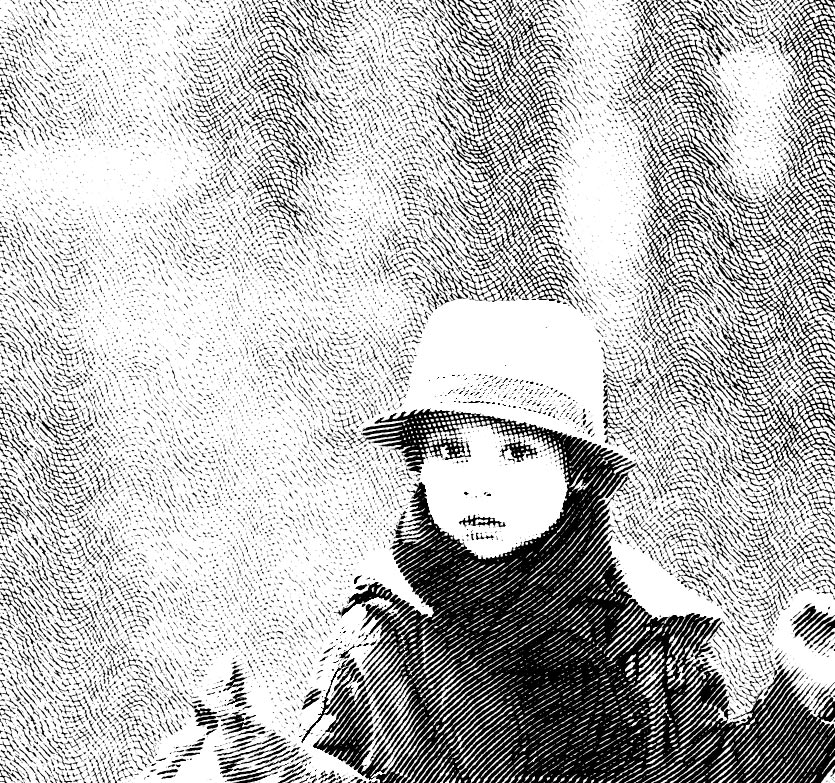
Few samples of different background types
Each background type contains a lot of ajustable parameters and indeed itself is a kind of high-end special effect
EngraverAI contains a tens of engraving background types. And each background type contains a lot of adjustable
parameters. It all forms a countless combination of possible realistic engraving effects. Bellow there are few engraving background samples.
But really, the number of possibled variants is endless.
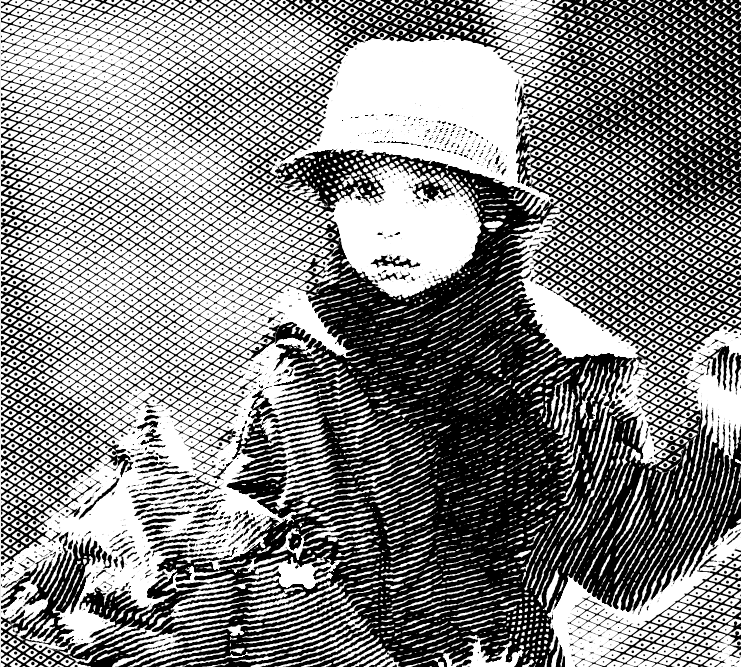
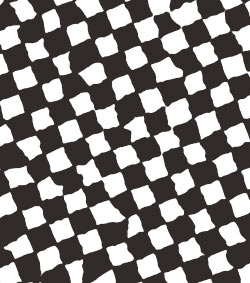
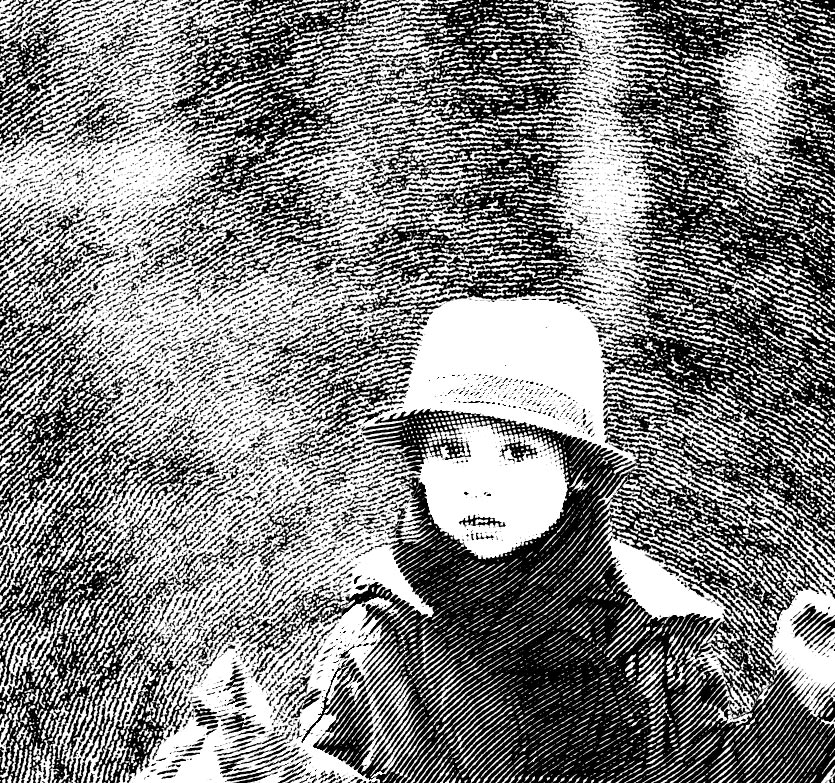
Little more samples of really helpful backgrounds (Click to enlarge)
Foreground essential group- No Foreground – by checking this box, you can remove the foreground from processing and display a scene as a solid background.
 - beside the No Foreground checkbox, you can see an image with a snowflake pictogram.
By clicking this button, you can freeze current foreground parameters. It is helpful in real workflow. If you already adjusted a beautiful
combination for your foreground pattern and start to adjust i.e. background, then this button can prevent foreground parameters from casual damage. - beside the No Foreground checkbox, you can see an image with a snowflake pictogram.
By clicking this button, you can freeze current foreground parameters. It is helpful in real workflow. If you already adjusted a beautiful
combination for your foreground pattern and start to adjust i.e. background, then this button can prevent foreground parameters from casual damage.- Foreground segmentation – this parameter is so important that I bordered this with a green line. By using this control, you define
how your foreground objects will be decomposed on segments. On each splinted segment, the engraving effect will be applied differently according to
how the inner math dictates. Always start to adjust engraving parameters and set up how your image should be fragmented.
Engraving parametersThe EngraverAI plug-in has a big number of adjustable parameters which response for engraving curves geometry and appearance. You can obtain an infinity
number of engraving effects by combining different parameter settings of the plug-in. Bellow there are only few samples of possible engraving effects.
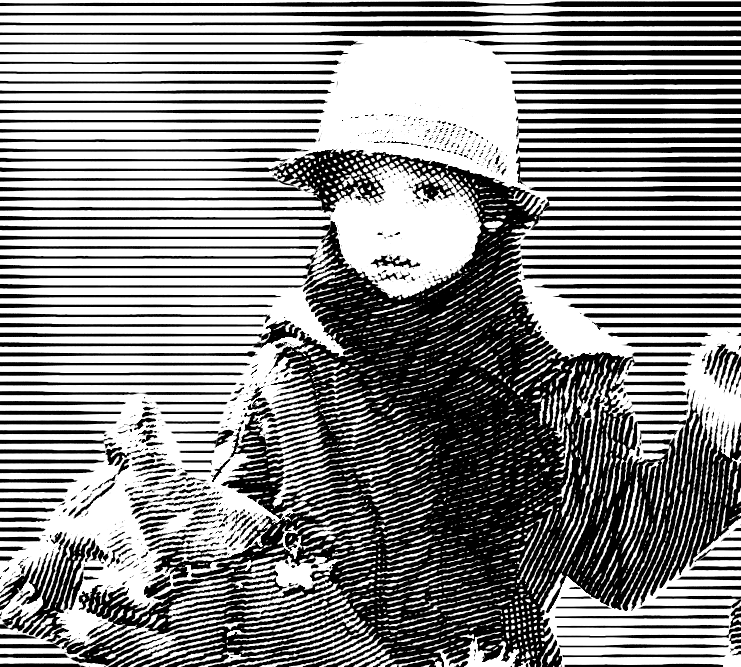
Some samples of engraving curves. You can setup much more curves parameters(Click to enlarge)In center of controllers area there are a tabbed dialog with two pages:
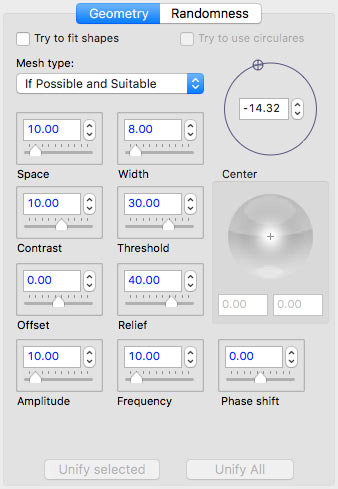
Geometry – on this page, collected parameters respond for the geometry of engraving patterns.
Randomness – this page contains parameters that allow you to make engravings look like handmade art, but not as synthesized. Geometry pageTree parameters described below define an inner logic about how artificial intelligence will try to represent your picture. The art is in how
to adjust these parameters to obtain spectacular results. It takes some time to master this process, but the result of this effort is worth it. - Try to Fit Shape - if this box is checked, then the plug-in will try to make an engraver pattern from lines repeating contours
of objects (when it is possible). Else, each segment will be covered with waved curves rotating along the main contour direction.
- Try to Use Circular - if the above option is checked, then the Try to Use Circular option will allow you to cover
segments with radial contours (when it is suitable and possible). It can look showy, especially on different kinds of letters and artificial round objects like logos, etc.
Try to Use Circular is On
|
Try to Fit Shape is On
|
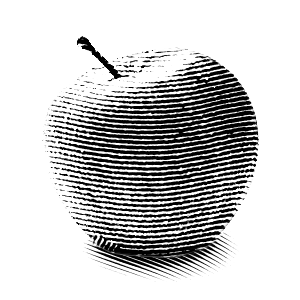
Try to Fit Shape is Off. Just a waved line
|
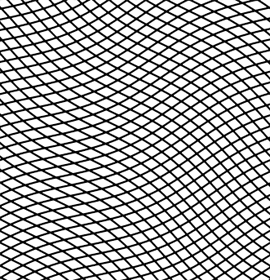
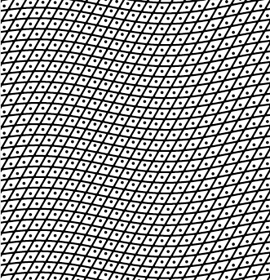
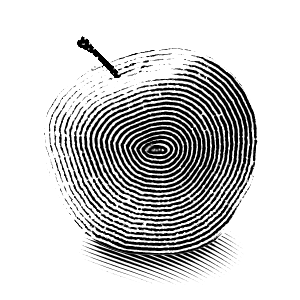
- Mesh Type – defines lines intersection of different segments (when it is possible and suitable). If you adjust the parameters
for an individual selected fragment, then several types of meshes are possible in this list additionally.
Samples of different meshes types
Real backgrounds should not look as synthetic. The plug-in contains means to make any background indeed realistic.(Clickable)Following parameters are simple and it is more obviously how to use these- Space – spacing between engraving lines.
- Width – thickness of engraving lines.
- Contrast – increases or decreases line width depending on initial picture intensity.
- Threshold – another way to adjust dependence of line widths and initial picture intensity. If this parameter value is -100 then line width is not dependent on initial picture intensity.
- Offset – this option shifts patterns, or ink plates when a multicolor palette is used.
- Relief – sets up an additional random geometry distortion depending on initial picture intensity.
- Amplitude –sets amplitude of waves.
- Frequency – the frequency of patterns, waves or zigzags.
- Phase Shift – shift of phase for patterns, waves or zigzags.
- Rotation – defines the angle a geometric pattern is rotated.
- Center of Effect – this shade sphere control determines the center of some geometric patterns. Also, you can adjust this parameter directly in preview by moving a crosshair mark with mouse.
- Unify selected – this button lets you delete customized parameters for a selected fragment and make its parameters similar, like global engraver parameters.
- Unify All – this button allows you to delete customized parameters for all segments and make their parameters the same as
global engraving parameters. If you changed Foreground segmentation then all individual segment settings will be reset.
|  |
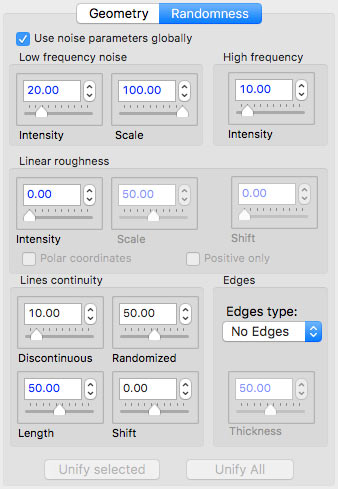
Randomness Page- Use Noise Parameters Globally – if this box is checked, then you cannot set up noise parameters for individually selected fragments, only globally for all segments.
- Low-Frequency Noise – these options add low-frequency noise to engraving lines.
- Intensity –value of random distortion.
- Scale –size of distortion.
- High-Frequency Noise – adds high-frequency noise to engraving lines.
- Intensity –value of random distortion.
- Lines Roughness – these options add random noise to line widths. Unlike the previous groups these parameters don’t distort geometric curves, but apply noise to curve widths.
- Intensity –value of noise pattern.
- Scale – size of noise pattern.
- Shift – offset of noise pattern.
- Polar Coordinates –calculates noise pattern in polar coordinates. It affects certain engraving patterns like rings, helixes, etc. (available when using radial patterns like rings and spirals).
- Positive Only – applies width noise only as positive (available when Intensity is > 0).
- Lines Continuity – these options add a randomly discontinuity to engraving curves.
- Discontinuous – value of discontinuity. If the value is 0, lines are continuous. As values move towards 100, lines break up and start to disappear.
- Randomized – whether discontinuity is regular (0 = all line segments and spaces have similar length) or random (> 0 = line segments and spaces are random).
- Length – lengths of segments.
- Shift – offset for discontinuity pattern.
- Edges – these options add noise artifacts on curve edges and make compositions looked more realistic.
- Edge Type – type of edge effect.
- Thickness – thickness of edge effect.
- Unify selected – this button allow you to delete customized parameters for a selected fragment and make its parameters similar, like global engraver parameters.
- Unify All – this button lets to delete customized parameters for all segments and make their parameters same as global engraving parameters. If you changed Foreground segmentation then of course all individual segments settings will be reset
.
|  |
In the right botton corner of plug-in's window you can find parameters for setup separatelly background and foreground inks colors and color modes. Also here you can choose an underlied paper texture from presented in library Images made by EngraverAI should not exactly be B&W. You are free in your work to experiment with ink colors and paper textures. The plug-in contains a widely variety of colorization means. The final result is limited with your fantasy only. Engraving composition looks much more realistic if play with ink's colors and background paper.(Click to view big)
|
| | | | |
| | |
| Installation and Registration | |
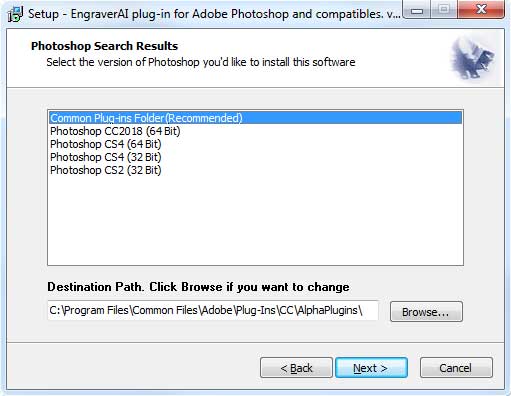
| |  Windows Installation. Windows Installation.
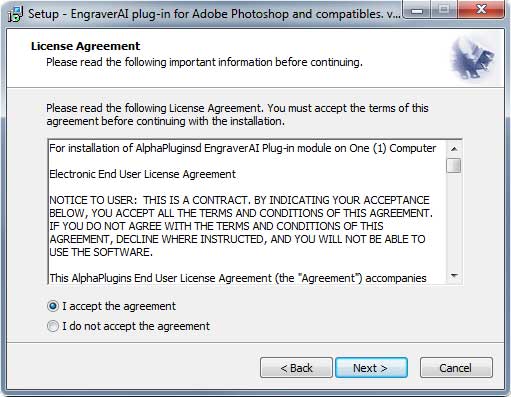
Installing EngraverAI is very easy.
- Download the EngraverAIInstaller.exe file from here.
- Launch this file and follow the instructions.
 If you have both 32bit and 64bit versions of Photoshop, then please, attend what version of plug-in you would like to install: (32bit), or, (64bit). If you have both 32bit and 64bit versions of Photoshop, then please, attend what version of plug-in you would like to install: (32bit), or, (64bit).
- During installation the installer will attempt to automatically detect all installed versions of Photoshop, and will offer a variant of target path. If you have a version of Photoshop Creative Cloud then you can install plug-in into a common pug-ins folder:
C:\Program Files\Common Files\Adobe\Plug-Ins\CC
In this case, you should not reinstall plug-in if you will install future Photoshop's versions. Else, you always can install plug-in into a local plug-ins folder i.e.:
C:\Program Files\Adobe\Adobe Photoshop CC2019\Plug-ins.
.
- Click the Next button, and complete the installation.
| To install the plug-in using an image editing program other than Photoshop, please consult the plug-in installation section in the user manual for whichever editor you have chosen. |
|
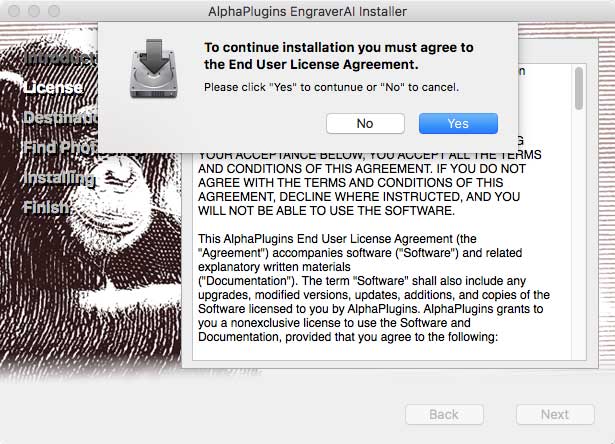
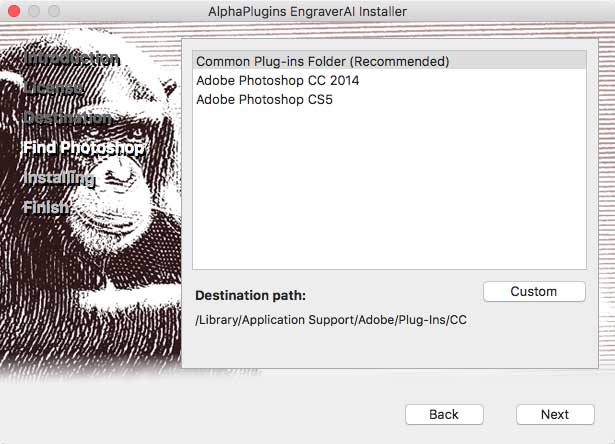
 Macintosh Installation. Macintosh Installation.
When installing the EngraverAI plug-in for Macintosh, our smart installer will locate the correct installation path for you — easily and automatically. - Download the EngraverAIInstaller.zip file from here.
- then, unzip it.
- Launch the EngraverAIInstaller application and follow the instructions.
- The plug-in finds all installed versions of Photoshop. You should choose one. If you have a version of Photoshop Creative Cloud then you can install plug-in into a common
plug-ins folder:
/Library/Application Support/Adobe/Plug-Ins/CC
In this case, the plug-in will be available for all versions of Photoshop CC include future.
As variant you can install plug-in into a local plug-ins folder i.e.:
/Application/Adobe Photoshop CC2019/Plug-ins
or you can press "Custom" button and browse any other appropriate folder of your choice.
- Click the "Next" button and all the necessary files will be installed in the chosen folder.
| To install the plug-in in Adobe Photoshop Elements, locate the plug-in folder specifically for that image editor. |
| It is recommended to setup properly permissions for AlphaPlugins folder where the plug-in is installed.
How to change folder permissions you can read i.e. here. |
|
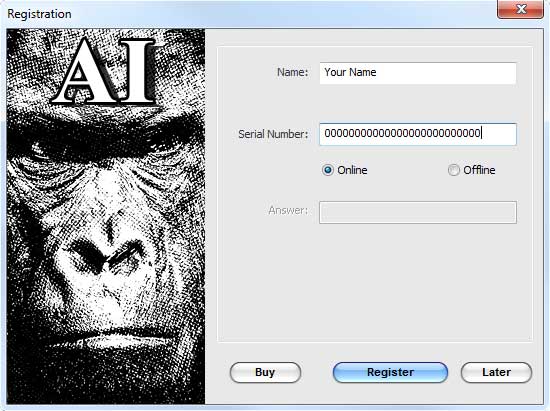
RegistrationYou will automatically receive the serial number for your copy of EngraverAI immediately following your purchase. There are two ways that you can register your copy of the EngraverAI plug-in: Online, and Offline. Online Registration.If you are connected to the Internet, then Online registration is the simplest way to register your copy of plug-in. After launching EngraverAI, you will see a registration dialogue box. Just select the Online registration option; insert your name; enter the serial number you received; and, click the Register button. The EngraverAI plug-in will automatically connect with our registration server to complete the registration process, sending you a confirmation message that the registration of your plug-in has been successful. Then, just click the Close button — registration is complete, and you are ready to use your new EngraverAI plug-in! | If you are currently operating with an Internet firewall in place, it is recommended that you switch it off temporarily during the registration process. |
Offline Registration.Even if you do not use an Internet connection with your computer, you can still register your EngraverAI plug-in. You can self generate an offline answer if you use this form or contact us to obtain this offline answer (for the Offline registration process) if you cannot connect to the Internet — or if you are determined to keep your photo-editing computer isolated from any direct connection with the Internet. The Offline Registration Number is a numerical ID which will be valid for a few days: to complete your registration, just select the Offline option in the registration dialogue box; insert your Name, Serial Number, and Offline Answer; then click Register to complete the registration process, and Close the registration dialogue window. | Remember: Per one serial number You can register so number of plug-in instances as number of licenses you purchased. I will however allow an extra registration for each plug-in serial number, so that users can install EngraverAI on, for instance, both their desktop and laptop computers. |
|
 | EngraverAI is a plug-in that works on much more than just Adobe Photoshop! Our software enables you to launch this plug-in (and many others) using graphic image editing programs that do not normally support Adobe Photoshop plug-ins. So, even if you do not have Adobe Photoshop on your computer, you can still launch Photoshop plug-ins — using AlphaPlugins LaunchBox! By using LaunchBox, you can run a range of Photoshop plug-ins (including EngraverAI) using applications such as Adobe Lightroom, iPhoto, Aperture, and many others. You can start running EngraverAI right out of the LaunchBox no matter what image editing software you are currently using! |

| | | | |
| | |
| Conclusion | |
| |
EngraverAI is a unique and powerful tool what with help of artificial intelligence lets create complex and beautiful engravings arts what are looked like were hands made by a real craftsman
|
| | | | |
| | |
| System Requirements | |
| |
Windows
- Windows OS, Windows 7, Windows 8, 10, 11 or later
- 2 GHz processor or higher
- At least 2Gb of RAM or more
- 1024 x 768 display or bigger
- Adobe Photoshop CC5-CC2023 or later
|
Also. you can use Photoshop compatible editors which support Photoshop plug-ins like Affinity, Corel Photo-Paint, Corel PaintShop Pro, JASC PaintShop Pro, Xara Picture Editor, GIMP, Ulead PhotoImpact and etc. |
Macintosh- Mac OS X 10.7 or higher
- Intel or M1 processor
- At least 2Gb of RAM or more
- 1024 x 768 display or bigger
- Adobe Photoshop CS5 - CC2023 or later
|
You can use EngraverAI plug-in not only into Adobe Photoshop. But also you can launch this (and many other) plug-in under other graphical application which dont support Adobe Photoshop plug-ins.
Even you can havent Photoshop on your computer. With help of our utility AlphaPlugins LaunchBox you can launch Photoshop plug-ins (include EngraverAI) under so applications like Adobe LightRoom, iPhoto, Aperture and many similar. |
|
| | | | |
Copyright, 2023, AlphaPlugins, LLC.
Author: Maxim Chernousov.
You can find more information about EngraverAI plug-in. Please, visit EngraverAI's product page on our site. There you can find freshest version of this product. Also you can find tutorials and samples for our products. |
|
|